Foundation and sill line
The joint where the wood sill sits on the foundation is one of the most common ways in, especially at inside and outside corners. On a brick house, weep holes need covering too.
At your house
Not checked yet
Look at this spot with the free check. Your answers stay on this device.
Where to look
- The joint where the wood sill sits on the foundation, all the way around the house.
- Outside and inside corners, where the sill boards meet and the siding stops short.
- Where steps, patios or porches meet the house.
- Cracks or gaps in the foundation, and vents in the foundation or crawl space with damaged screens.
- On a brick house: weep holes along the bottom row of brick, and above windows and doors. These need covering, not sealing.
Sign to look for Droppings or rub marks along the sill, and small burrows or worn paths along the foundation.
The rule of thumb: if a gap is about the width of your finger, a mouse can use it. Also called the pencil or pinky test. A young mouse needs only a 1/4-inch gap, about the thickness of a standard pencil, to get its skull through. If the skull fits, the body follows.
Why mice use it, and the common mistake
Why mice use it
The sill line is at ground level, right where mice run along the wall. Concrete and wood move differently, so a gap can open between them, and the corners, where boards meet, are where it shows up most.
Common DIY mistake
Stuffing the sill gap with foam or steel wool. Mice chew through foam, and steel wool rusts away, so the gap opens right back up. On a brick house, never fill weep holes either. They're there to let water out.
The lasting fix
Back it with 1/4-inch hardware cloth (stainless or heavy galvanized) or exterior-grade metal, then seal it in with exterior-grade sealants or adhesives.
What NOT to seal
Some openings have to drain or breathe. Sealing them causes rot, mold or a safety problem.
- Never plug masonry weep holes solid. Cover them with breathable weep-hole guards, mesh or hardware cloth so water can still drain out.
- Never block combustion air vents. Gas furnaces and water heaters need that air to burn safely.
- Never block soffit or attic intake vents. The attic needs that airflow. Screen a damaged vent with hardware cloth instead of closing it.
- Never block dryer exhausts. They have to stay open to the outside.
The lasting fix, step by step
Walk the sill line
Walk all the way around the house and look low, where the siding ends and the foundation begins. A flashlight helps you see into the joint.
Start at the corners
Check every outside and inside corner first. That's where the sill boards meet and where gaps are most common.
Use the finger test
If a gap along the sill is about the width of your finger or wider, mark it.
Seal the joint with metal
Fit exterior-grade metal or hardware cloth into the gap, and seal it in with exterior-grade sealants or adhesives. Repair cracked foundation with a masonry patch.
Brick house extra: weep holes
On a brick house, small weep holes along the bottom row let water drain out. Cover them with stainless steel weep-hole covers or mesh inserts. Never fill them.
Fix vent screens
Replace damaged foundation or crawl space vent screens with 1/4-inch hardware cloth (stainless or heavy galvanized), fastened and sealed in.
The base of a shared building is usually common property. Report gaps along the sill line and at the corners to your HOA or building manager.
Materials
- Exterior-grade metal
- 1/4-inch hardware cloth, 19- or 23-gauge, stainless or heavy galvanized
- Exterior-grade sealants or adhesives (not standard acrylic caulk)
- Masonry patch
- Brick houses only: stainless steel weep-hole covers or mesh inserts
Specs that matter. Use 1/4-inch hardware cloth as the backing, then seal over it with exterior-grade sealants or adhesives. Half-inch mesh and cheap acrylic caulk from the hardware aisle won't stop young mice: they get their skulls through, and the body follows.
Safety notes
- On a brick house, never seal weep holes shut. Moisture trapped in the wall causes rot and mold.
- Keep crawl space and foundation vents open for airflow. Screen them, don't block them.
- Call before you dig near the foundation, so you don't hit buried lines.
Before you seal the last gap
- Make sure nothing is still living inside. If mice are already in, set enclosed snap traps along the walls as you seal, never as a substitute for sealing.
- Clear clutter and cardboard away from walls and corners, so there are fewer places to nest.
Check spot 5, at the back of the house
Low decks has its own guide
Where to look, why mice use it, the common mistake and the lasting fix.
On a real house
Before photos from homes we’ve inspected, with the gap marked in highlighter.
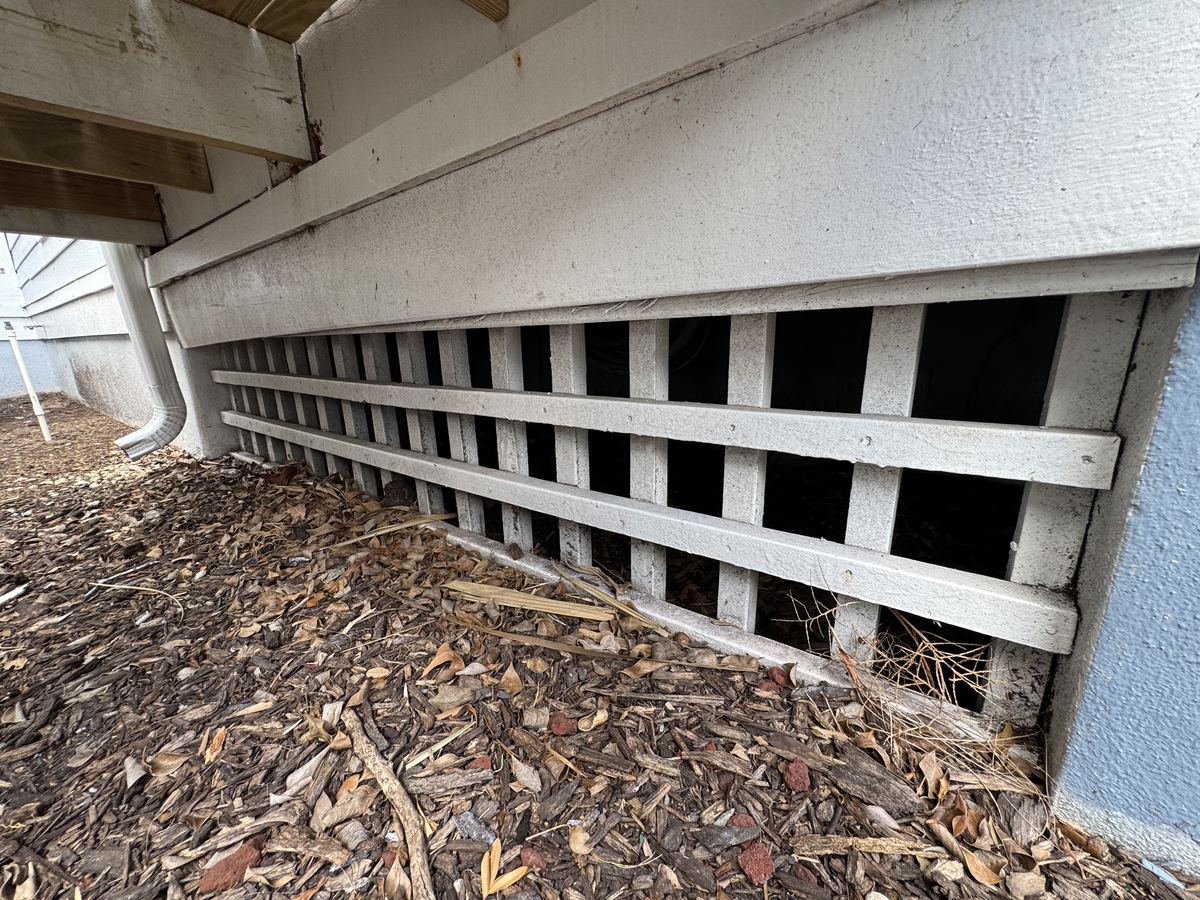 Before
Foundation line: lattice skirting looks closed from the yard, but every opening leads straight into the crawlspace. 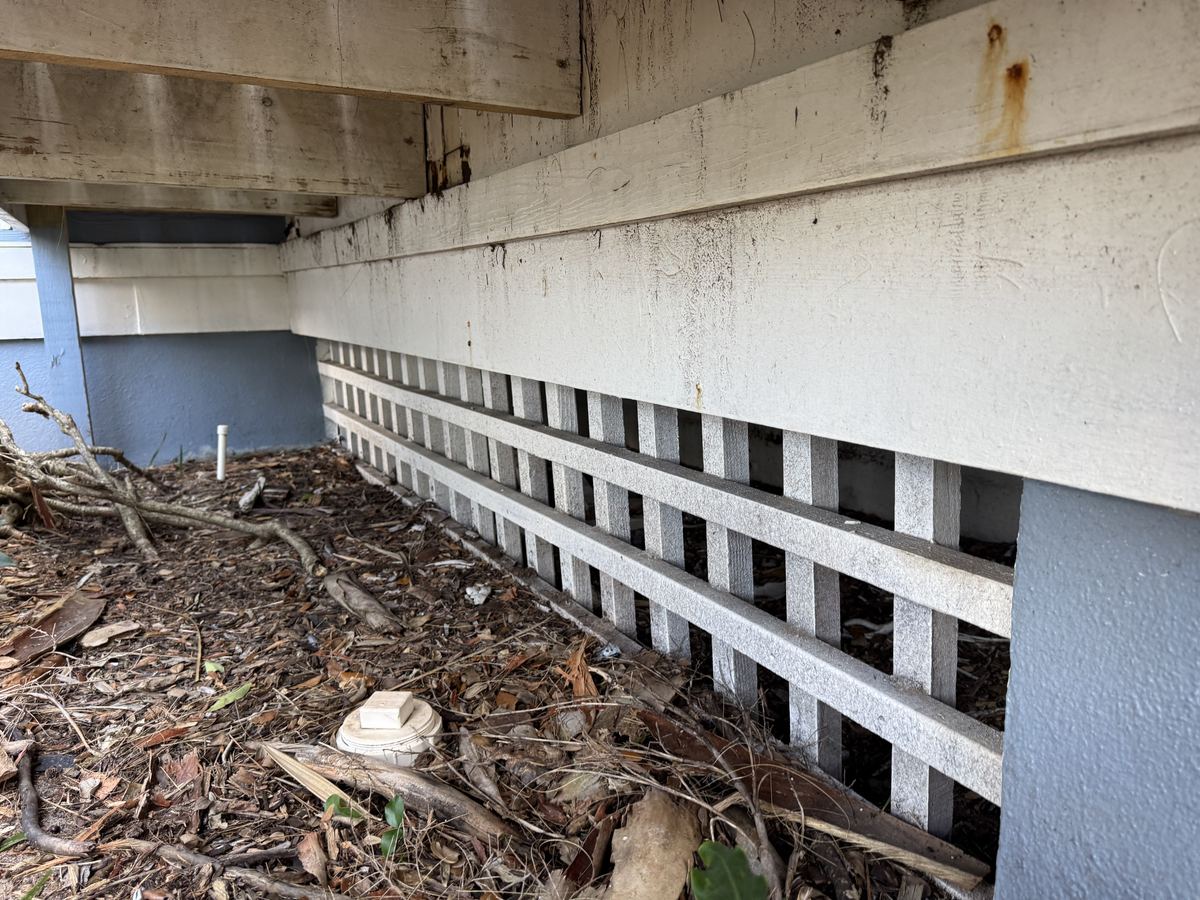 Before
Foundation line: gaps between the lattice slats run the whole length of the house.
What not to use
This is not our work. It’s an example we found on an inspection.
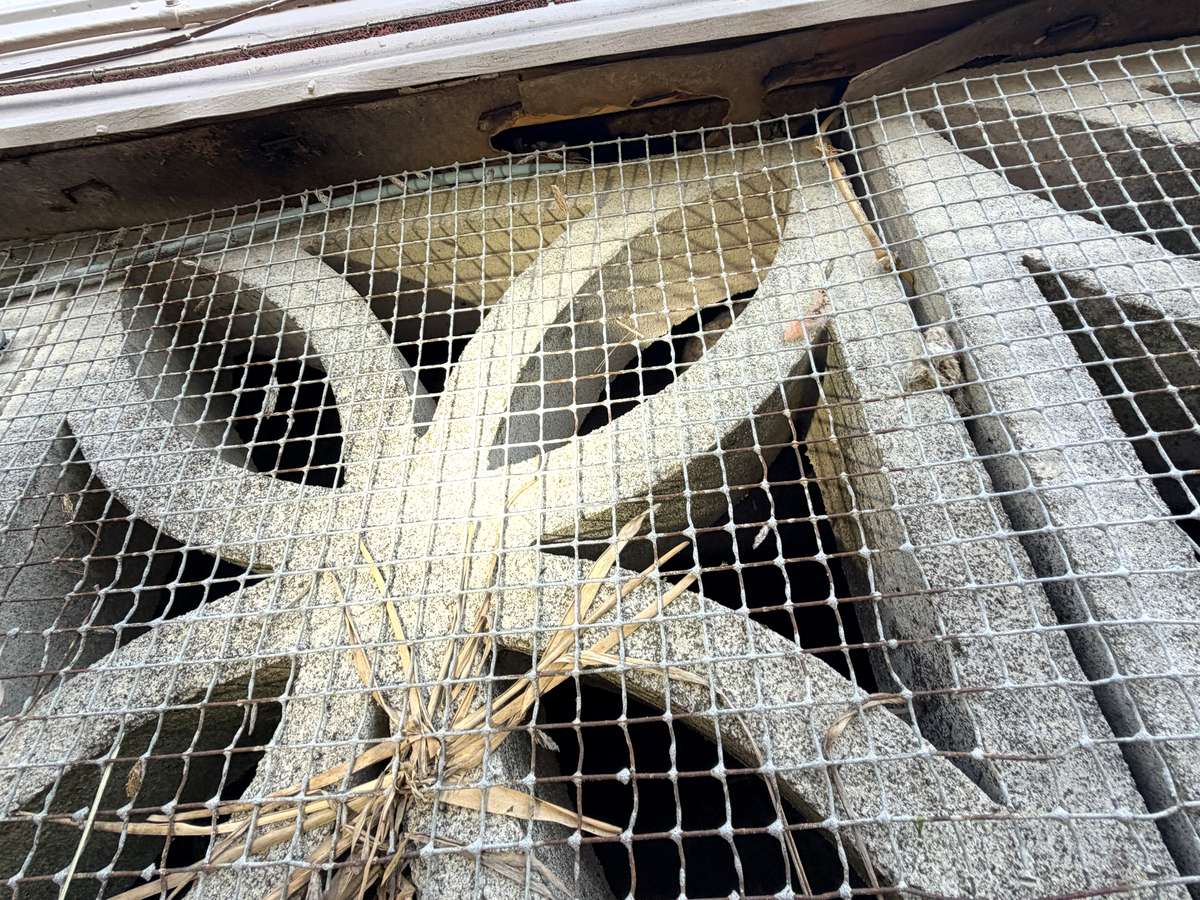
Thin wire cloth tacked over block skirting vents. It rusts and wears through, the openings are too big to stop a mouse, and the edges are left loose.

Related spots
Mice that use this gap often use these too. Check them on the same walk.
When in doubt, seal em out.